ROBUSKEY® Operation Guide
for Adobe® Photoshop® ( Windows Version 3.1 )
May 1, 2011
Copyright © 2008-2011 Research Institute of Systems Planning,Inc. All rights reserved.
This file is subject to change without any notice. Research Institute of Systems Planning Inc. / ISP does not assume the responsibility on any errors or inaccuracies in this file, and even if the reader is disadvantaged by what is described in this file, and assumes no responsibility or no compensation. Reproductions/distributions in any form for purposes other than personal use require Research Institute of Systems Planning Inc. / ISP's written permission. The permission must be obtained prior to use. However, this does not restrict any rights that Japanese Copyright Law does not set forth.
Table of Contents
What is Operation Guide for
Back to Table of Contents
Basic Operation and Screen Instruction
Here describes ROBUSKEY's screen instruction and basic operation.
- Screen Instruction
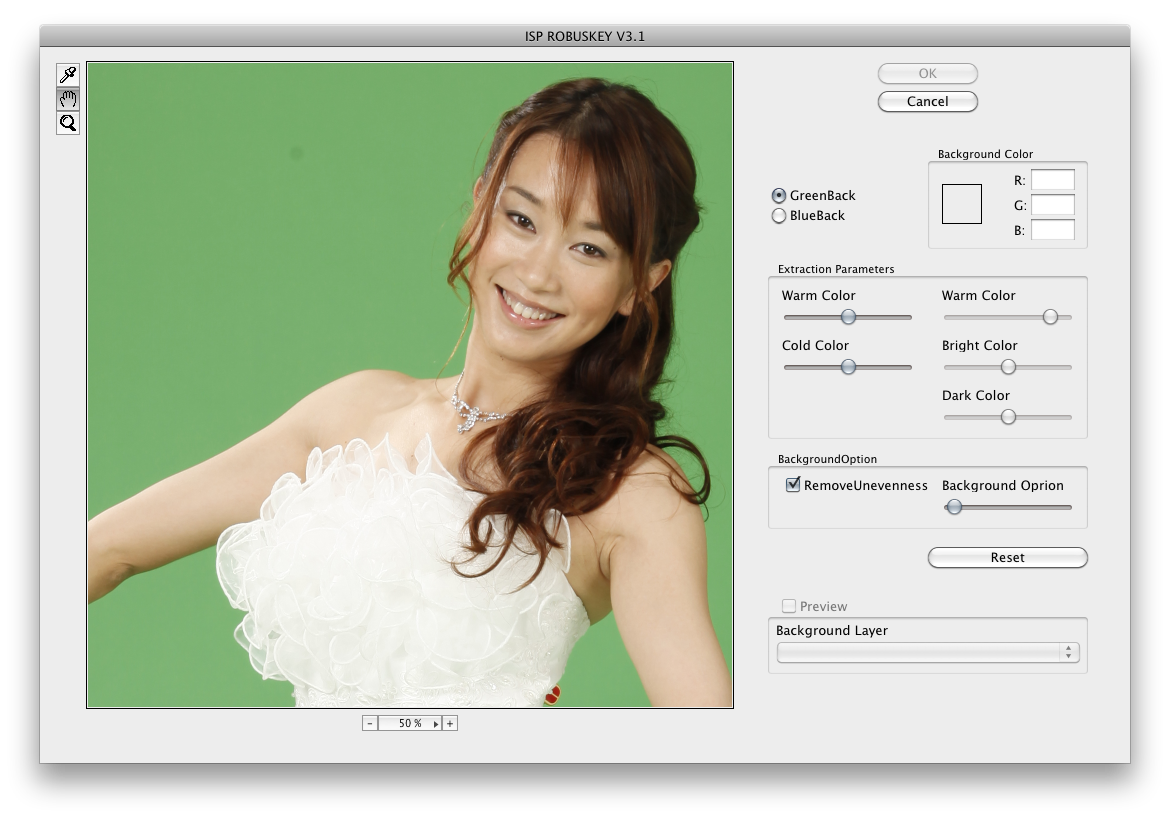
When you open ROBUSKEY, you will see ROBUSKEY operation windows like this.
† Sample Image on Macintosh (Photoshop CS5)
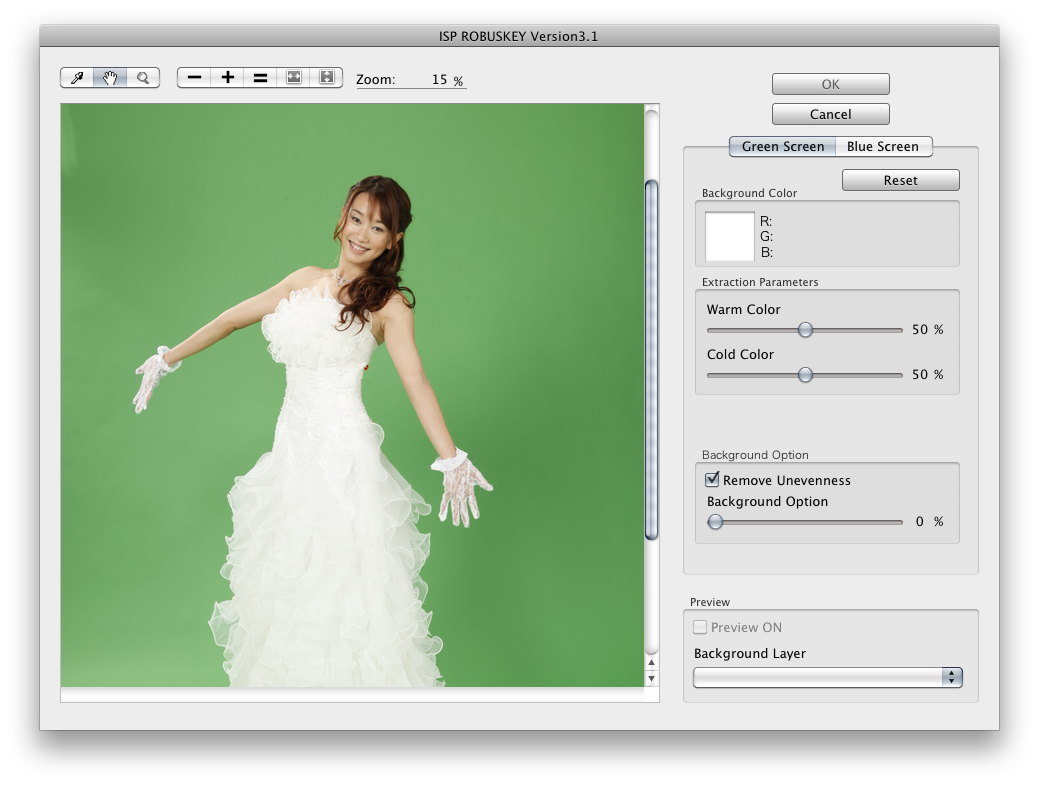
† Sample Image on Macintosh (Photoshop CS3, CS4)
† Sample Image on Windows
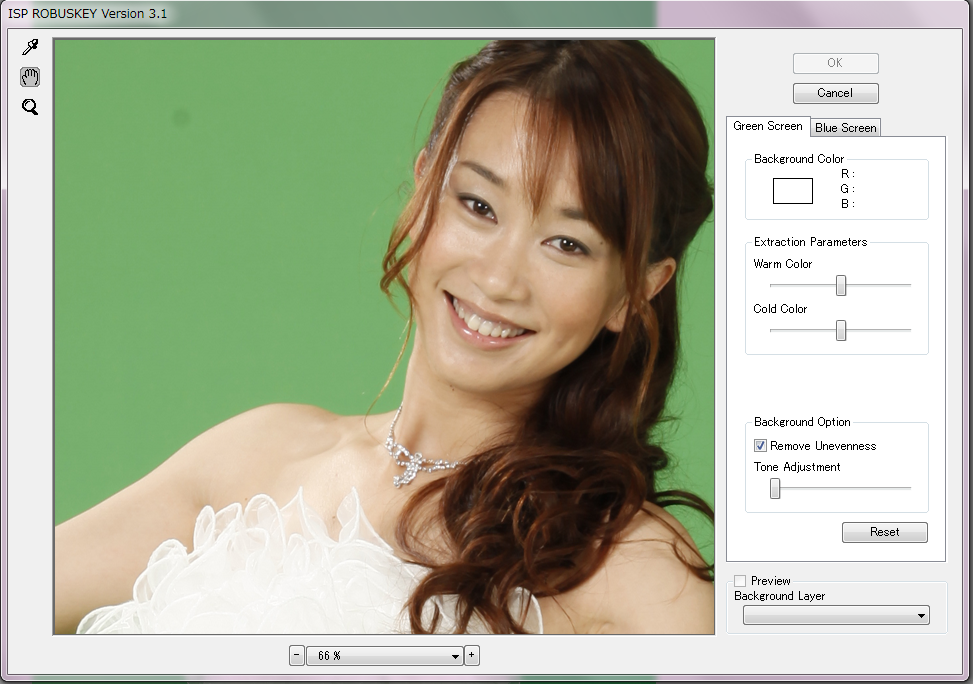
Here are descriptions of main controls, what you need to know first.
| Main Controls |
Descriptions |
| OK Button |
Executes Chroma-Keying, outputs its result to Photoshop layer.
Pressing enter key takes the same action. |
| Cancel Button |
Interrupts Chroma-Keying procedure and backs to Photoshop operation. The original layer will not be changed.
Pressing ESC key takes the same action. |
| Image Display Area |
Dispalys the image to be processed. |
Tool buttons on the upper-left corner of image display area. Tool buttons define mouse pointer's function.
| Tool Buttons |
Descriptions |
| Eyedropper Tool |
Selects background color. On clicking image display area, the color of the point is assigned as background color. |
| Hand Tool |
Moves image displayed in image display area. By drag and drop, displayed image moves. |
| Zoom Tool |
Zooms in/out of image display area. Zooms in by click, zooms out by Alt+click. (Unavailable on Photoshop CS5. will be enabled soon) |
Scale Control is on the bottom of image display area. Scale Control changes magnification rate of image display area.
| Scale Control |
Descriptions |
| Magnification Pulldown Menu |
Sets magnification rate of image display area. You can select from 6% to 1600%, and adjust to width / height. |
| + Button |
Increments magnification rate by 1 step, upto 1600%. (Unavailable on Photoshop CS5. will be enabled soon) |
| - Button |
Decrements magnification rate by 1 step, upto 6%. (Unavailable on Photoshop CS5. will be enabled soon) |
Parameter Setting Area is on the right hand side of image display area. For the details of how each parameter takes effect, see "Parameter Description".
| Parameter Setting Area | Descriptions |
| Processing Mode |
Selects Chroma-Key processing mode. Select from green backgroung mode and blue background mode. |
| Background Color |
Displays background color selected by eyedropper tool.
Specifying color by entering value from keyboard is not supported. |
| Despill Adjustment |
Defines the range of despill color for Chroma-Keying process.
Parameter is different between green background mode and blue background mode. |
| Background Tone Adjustment |
Defines the amount of shadow removal reflecting of the background. |
| Reset Button |
Resets all parameters to initial value. |
Preview Control is on the lower-right corner of the window.
| Preview Cotnrol | Descriptions |
| Preview Check Button |
Displays result in image display area, by Chroma-Keying with given parameters. |
| Background Layer Pulldown Menu |
Selects background layer for preview. All layers of current image is listed. |
- Basic Operation
Image synthesis with ROBUSKEY takes the following steps. If you have got an Photoshop image which its preprocess has done, open it and start from step 1.
| Step |
Descriptions |
| preprocess |
Open Image |
Run Photoshop, open foreground image (green background / blue background image you would like to Chroma-Key) and background image. Images must be RGB color 8bit channel mode. |
| Foreground Image Preparation |
When you open an image file whose file type is other than Photoshop, layer palette shows the image as "background" layer. Double click the background layer to convert it to normal layer. Now this layer can be used as "foreground image layer". |
| Background Image Preparation |
Select a region "the same size as foreground image", and copy it.
Create a layer beneath the foreground image layer, and paste the background image to it. |
| Select Foreground Image Layer |
Select foreground image layer on layer palette to activate it. |
| 1 |
Run ROBUSKEY |
Select "menubar > Filters > ISP > ROBUSKEY V3.1." |
|---|
| 2 |
Select Processing Mode |
Select green background mode / blue background mode, depending on the background color of the image you would like to Chroma-Key. |
|---|
| 3 |
Select Background Color |
Select Eyedropper Tool from tool buttons, click background area of the image displayed in image display area. The color of the clicked point will be the basis of chroma key. |
|---|
| 4 |
Previewing |
Press Preview button. image synthesized with the layer selected at background layer pulldown menu will be displayed in image display area. |
|---|
| 5 |
Fine Tuning with Parameters |
If there is a problem with synthesis quality, tune with parameters. |
|---|
| 6 |
Execute the Process |
Press OK button. Chroma-Keying will be processed and the result will be output in Photoshop layer. |
|---|
Back to Table of Contents
Tips for Taking Photos for ROBUSKEY
ROBUSKEY synthesizes specialized to green background image and blue background image, though, there is a range of color suitable to Chroma-Keying. ROBUSKEY performs its best with certain range of background color.
Lighting
ROBUSKEY has a function "Smooth BG" which clears background's uneven, though, ROBUSKEY performs more precisely by irradiate uniformly.
Or, by using the same lighting (orient light etc.) with the background image to be synthesized allows more natural synthesis.
White Balance
ROBUSKEY assumes that processing image's white balance is adjusted properly. Please set the appropriate white balance according to the instructions of your camera.
In particular, removal of reflections in the background to white skin and clothing must have been properly set the white balance.
Background Color Range
Here are the samples of suitable / unsuitable background color:
|
Green Backgrounds |
Blue Backgrounds |
|---|
| Most Suitable |
 HSB color system HSB color system
[ H=100°, S=60%, B=75% ] |
 HSB color system HSB color system
[ H=200°, S=60%, B=75% ] |
| ROBUSKEY performs its best with these background color or similar. |
| Unsuitable (Saturation) |  HSB color system HSB color system
[ S ≤ 40% ] |
 HSB color system HSB color system
[ S ≤ 40% ] |
| Extraction precision will decrease at edges like strand of hair. |
| Unsuitable (Brightness) |  HSB color system HSB color system
[ B ≤ 50% ] |
 HSB color system HSB color system
[ B ≤ 65% ] |
 HSB color system HSB color system
[ B ≥ 90% ] |
 HSB color system HSB color system
[ B ≥ 90% ] |
Increased noise will degrade the overall extraction accuracy.
|
| Other Unsuitable Color |
Some yellow | |
HSB color system is, expresses color by H(Hue), S(Saturation) and B(Brightness). You can see these values at "information window" of Photoshop. See Photoshop manual for detail.
Back to Table of Contents
Tips for Preprocessing Images
Here describes about the points you may want to care about the images you take, prior to open by Photoshop.
RAW Development
When shooting with High-spec camera such as digital SLR, RAW Development is needed prior to Chroma-Keying. In this case, extract precision increases when RAW development is done by development software included with camera, instead of Photoshop's Camera Raw.
ROBUSKEY is tuned for images taken by ordinary commercial camera, such as Canon, Nikon Olympus, Fuji Film etc. Since the characteristics of Photoshop's Camera Raw are very different, the extraction precision may lose depends on subjects. In particular, white color may remain at strand of dark-haired subject.
Color Tuning
Color tuning using tone curve etc, is recommended to use "after" ROBUSKEY processing is done.
ROBUSKEY implements its high quality in accurate detection by precise calculation, based on the relationshop between subject and background colors. When this color-relationship changes, by applying color tuning prior to Chroma-Keying, may cause of the decrease of extraction precision.
Back to Table of Contents
Fine Tuning on Image Synthesis
The quality of synthesized image can be tuned by editing parameters. For details of those parameters, see "Parameters Description".
Since ROBUSKEY is specialized to processing small region (such as strand of hair), other parts may take effect which you don't want..
You can solve this kind of problem by splitting image into a few parts by creating mask, apply Chroma-Key to each part with appropriate parameters, and then, shades them.
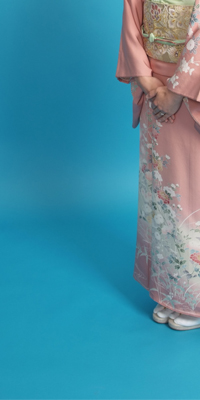
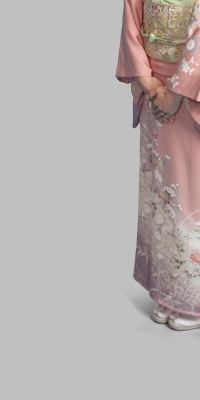
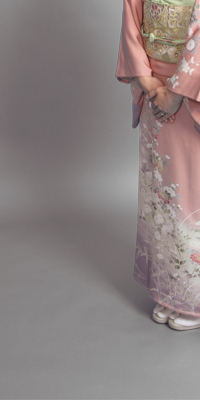
Example: Green Subject with Green Background
Here is how to Chroma-Key a subject contains green part with green background. Missing part of the color of subject, such as some yellow, can be amended in the same way.
|
Source Image |
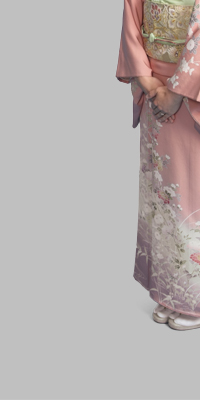
Result 1 |
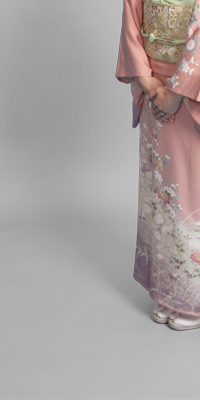
Result 2 |
|---|
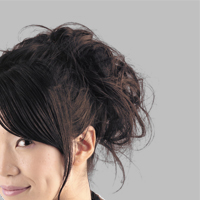
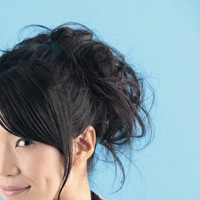
| Whole Image |
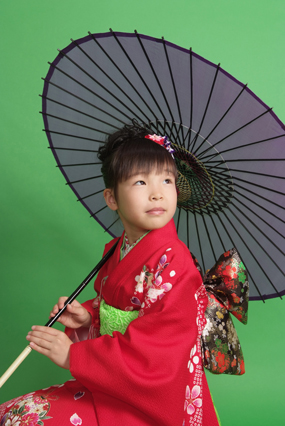 | 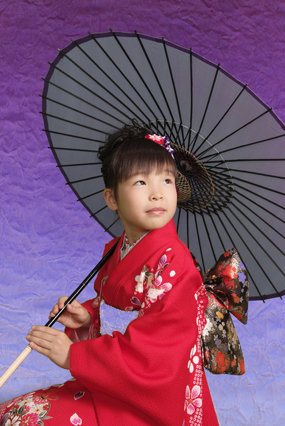 |  |
| Chroma-Keying whole image with ROBUSKEY results as "Result 1".. |
| Partial Image |
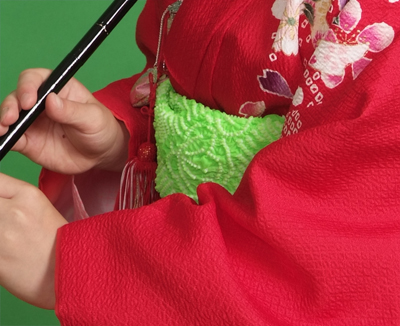 | 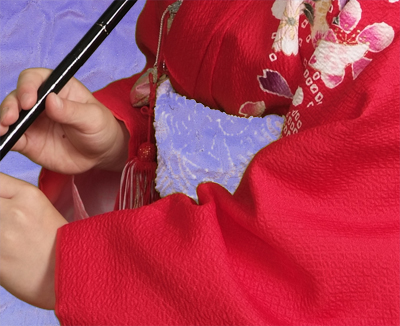 | |
| You can see her green belt has disappeared. |
| After Tuning |
|  | 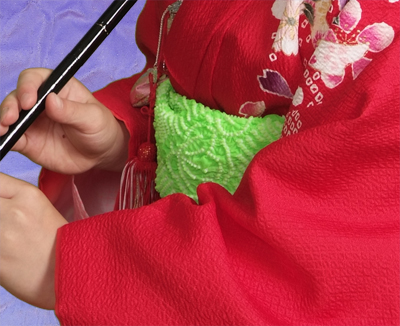 |
| Copy the original image and paste it into peripheral zone of transparent belt. |
Back to Table of Contents
Parameters Description
Here describes about how each parameter takes effect to Chroma-Key.
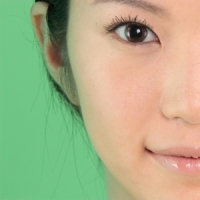
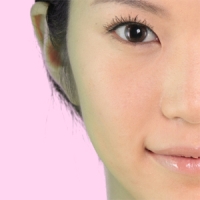
Despill Color Adjustment (Green Background Mode): warm colors(skin, brown hair etc.)
Despill Color Adjustment (Green Background Mode): cold colors(blueish clothes etc.)
In contrast to warm colors, amends amount of despill cold colors (such as blueish clothes etc.). Since ROBUSKEY V3.1 has achieved its algorithm, this parameter is little need to adjust.
Despill Color Adjustment (Blue Background Mode): warm colors (skin, brown hair etc.)
| Slides to Left |
When you use blue background, you can amend colors of the skin or brown hair by using this parameter. |
Slides to Right |
| Skin and brown hair will be more reddish. |
Skin and brown hair will be less reddish, becomes blackish. |
 |
 |
 |
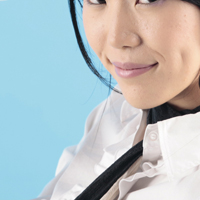
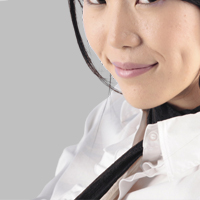
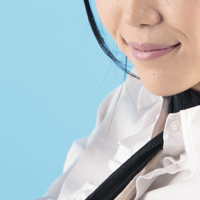
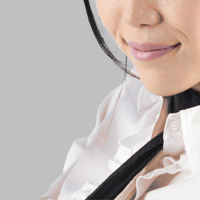
Despill Color Adjustment (Blue Background Mode): hilight colors (white vail etc.)
| Slides to Left |
Editing warm colors (skin, brown hair) parameter, may take effect to highlight part. In this case, amend colors by editing this parameter. |
Slides to Right |
| Highlight parts becomes rather veige/pinkish. |
Highlight parts becomes more whitish. |
 |
 |
 |
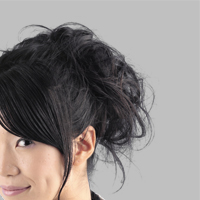
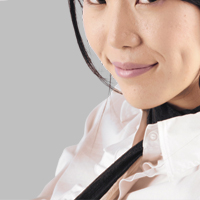
Despill Color Adjustment (Blue Background Mode): dark colors( black hair etc.)
| Slides to Left |
Editing warm colors (skin, brown hair) parameter, may take effect to dark color part. In this case, amend colors by editing this parameter. |
Slides to Right |
| The dark color part becomes rather brownish. |
The dark color part becomes more Editing warm colors (skin, brown hair) parameter, may take effect to highlight part. In this case, amend colors by editing this parameter.blackish |
 |
 |
 |
Uneven Background Correction and Background Tone Adjustment
Uneven background correction is often used with background tone adjustment, to control the amount of extraction in background area.
 |
Uneven Background Correction: On |
Uneven Background Correction: Off |
|---|
Despills shadows made by darkening of the lens or the subject.
|
You can also utilizing the shadow of the subject..
|
| Background Tone Adjustment(Left) |
 |  |
You can leave detailed outlines, such as strand of hair, while the amount of extraction decreases at dark part of the background.
|
| Background Tone Adjustment(Right) |
 |  |
You can leave more amount of extraction at dark part of the background, while detailed outlines, such as strand of hair are lost.
|
Back to Table of Contents
Copyright © 2008-2011 Research Institute of Systems Planning,Inc. All rights reserved.
†Adobe, Adobe Photoshop are registered trademarks of Adobe Systems Incorporated in United States and Other Countries.
†Windows is a registered trademark of Microsoft Corporation in United States and Other Countries.
†Other names / company names / product names mentioned above are trademarks or registered trademarks of their respective owners.